Introduction to Optical Image Registration
In order to import and overlay an optical image to the MIRO canvas, the following information is needed:
- Rotation Angle
- X Scale
- Y Scale
- X Offset
- Y Offset
- Image Flips
- Non-linear correction data
MIRO saves this data as *.irc files in the equip directory. When an optical image is imported, the data in the selected *.irc files is used.
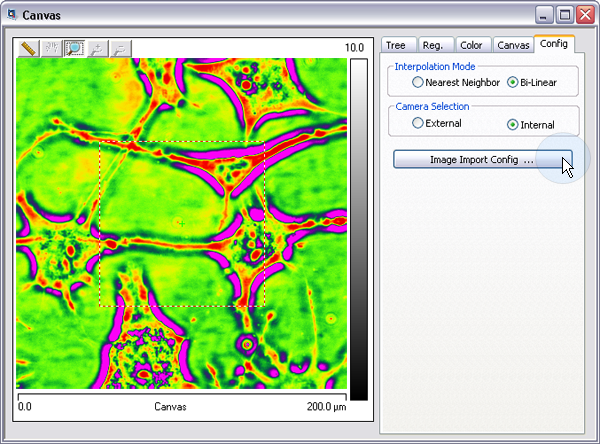
You can view, edit, create and delete these *.irc files using the Image Import Configurations window. To access the Image Import Configurations window, click the Image Import Config button in the Config tab:
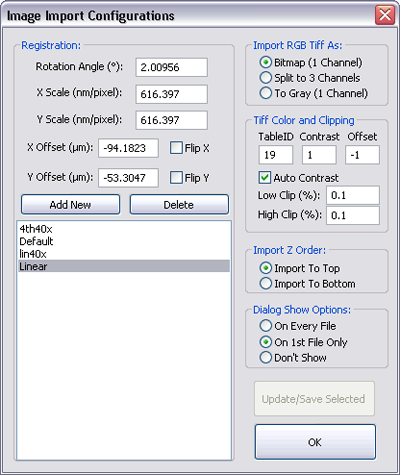
The Image Import Configurations window will open:
There are three ways to create or modify the registration *.irc file:
| |
- Estimate or calculate the registration data and enter it in the Image Import Configurations Window.
|

|
- After the optical image is “tweaked” (see Adjusting the Image) the registration data can be set/saved (*.irc file) by clicking the Set the current values as import registration icon on The Registration Tab.
|
| |
- Using the Calibration and Registration procedure
|
The Image Import Configurations window is also used to configure Import Z Order and Dialog Show Options:
Import Z Order Parameters
- Import To Top: Imports selected images to the top of the image tree.
- Import To Bottom: Imports selected images to the bottom of the image tree. Imported images may not be visible if they are beneath another image with high opacity.
Dialog Show Options
- On Every File: Opens the Configurations for Import window (see Importing Images) each time a file is opened.
- On 1st File Only: Opens the Configurations for Import window for the first file when multiple optical images are selected (select multiple images by holding down the CTRL key while clicking each file name).
- Don’t Show: Does not open the Configurations for Import window when optical images are imported.
NOTE: If you have turned the Don’t Show option "On" and wish to display the Configurations for Import window, you will have to access it through the Image Import Config. button in the Config tab.
NOTE: The
Dialog Show Options selection also affects the
Capture Optical/Video Image and Capture Tip Location functions.
| www.bruker.com
|
Bruker Corporation |
| www.brukerafmprobes.com
|
112 Robin Hill Rd. |
| nanoscaleworld.bruker-axs.com/nanoscaleworld/
|
Santa Barbara, CA 93117 |
| |
|
| |
Customer Support: (800) 873-9750 |
| |
Copyright 2010, 2011. All Rights Reserved. |
Open topic with navigation